
Blog
Why Sealed Meal Leaks Happen and How to Stop Them

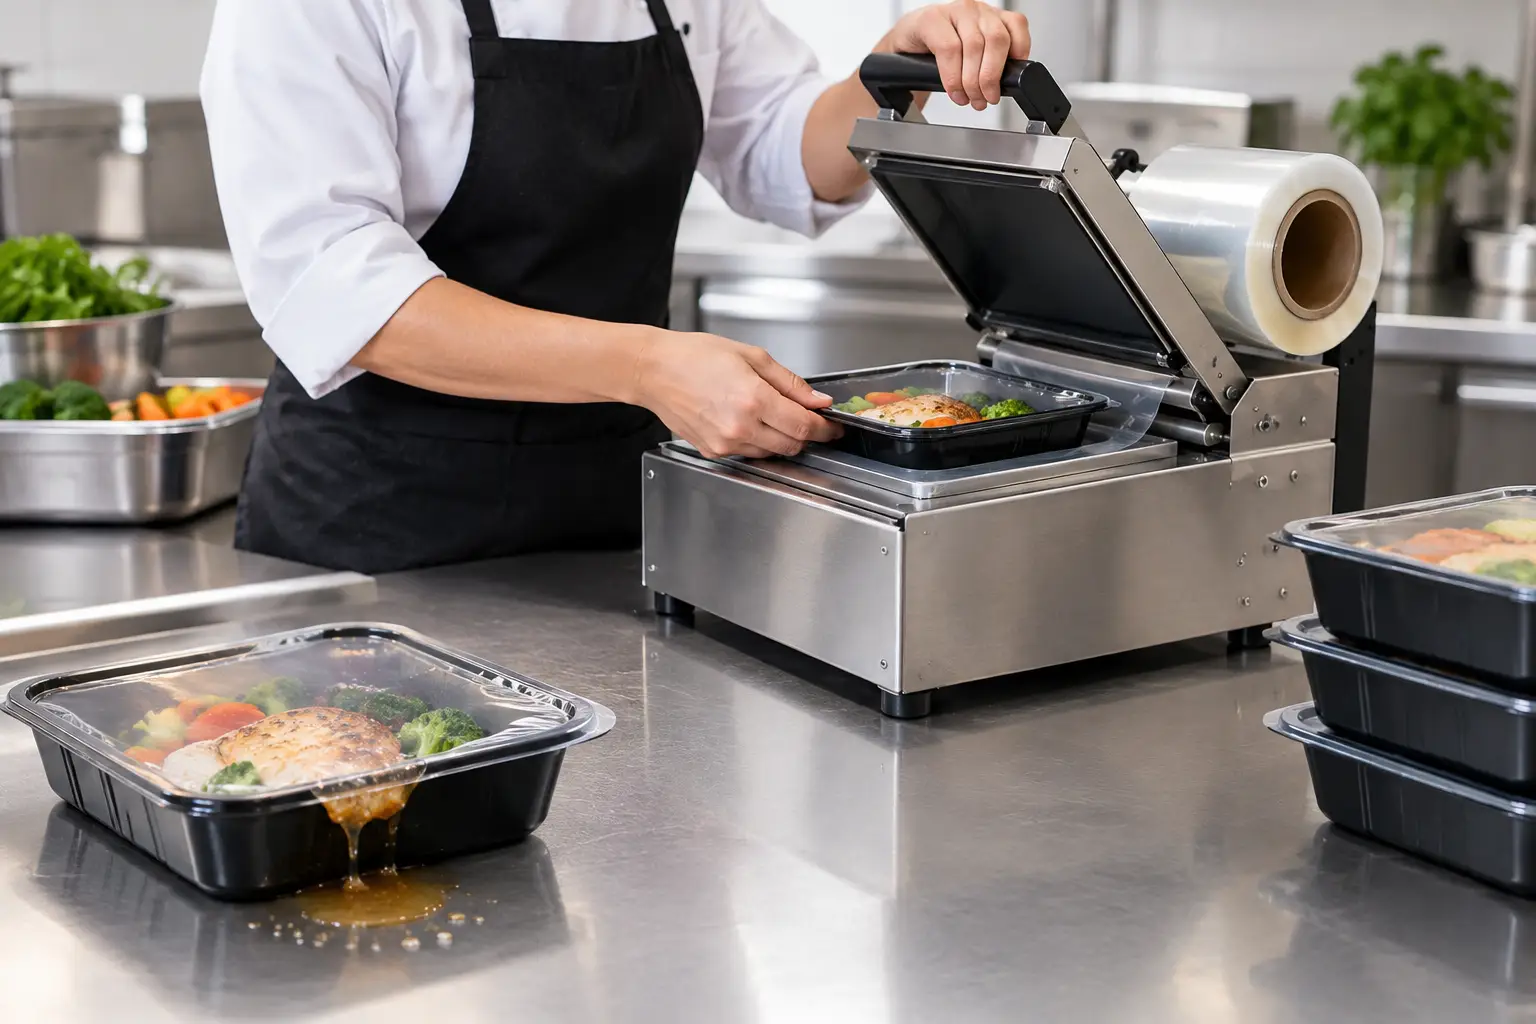
A leaking prepared meal can turn a well-run delivery program into a refund, a cleanup, and a poor first impression. Sealed meal leaks are rarely caused by one issue alone. More often, the tray, film, product temperature, fill level, machine settings, and operator workflow are not working as one system. SmartPackingUSA helps food businesses build packaging setups around compatible components so every tray leaves the line with a clean, dependable seal.
For restaurants, meal-prep companies, caterers, commissary kitchens, and food manufacturers, solving leaks is not simply about choosing a stronger container. It is about creating a repeatable packaging process that holds up through stacking, refrigeration, delivery, retail handling, and reheating requirements where applicable.
What Causes Sealed Meal Leaks?
A tray can look sealed at the packing station and still fail later. The failure may appear as a corner lift, a channel along the rim, liquid escaping from one side, or a lid that separates during transport. Identifying the pattern matters because each one points to a different part of the packaging process.
The most common cause is incompatibility between the tray and sealing material. A film or foil lid must be designed to seal to the specific tray material and rim profile. Plastic, CPET, aluminum, paperboard, and sugarcane containers do not all use the same sealing approach. Even trays that appear similar can have different flange widths, rim heights, coatings, or surface textures.
Product on the sealing flange is another frequent problem. Sauce, oil, condensation, food particles, or loose grains on the tray rim can interrupt the seal path. This creates a small channel that may not be obvious until the package is tilted or stacked. High-sauce meals, soups, marinated proteins, and oily side dishes require particular attention because one splash during filling can compromise an otherwise correct setup.
Heat, pressure, and dwell time also affect results. If the sealing cycle is too light or too short, the film may not bond consistently. If settings are too aggressive, film can distort, trays can warp, or the seal area can become uneven. There is no universal setting that works for every meal container. The correct combination depends on the tray material, sealing film, lid format, product conditions, and equipment design.
Overfilling adds another risk. A container filled too close to the rim leaves little room for movement, especially when hot food creates steam or the package is handled roughly. The lid may seal, but pressure and contact with the product can weaken the package during delivery.
Start With a Matched Packaging System
The most reliable way to reduce leaks is to source the machine, tray, and sealing material as a matched system rather than as unrelated purchases. A tray sealer cannot compensate for a film that does not bond properly to the selected container. Likewise, premium film cannot overcome a tray flange that is bent, contaminated, or inconsistent.
SmartPackingUSA works with operators to match tray sealing machines with compatible containers, sealing films, and foil lids based on the actual product being packed. That can include plastic trays for chilled meal programs, CPET options for applications requiring oven-ready packaging, aluminum containers, or paper and sugarcane packaging for brands pursuing a different material presentation. The important question is not which material is generally best. It is which combination performs reliably for your menu and workflow.
Before committing to a large packaging order, test the exact combination you plan to use. Fill trays with real products at normal temperatures. Seal them using the expected production routine, then refrigerate, stack, tilt, and transport samples as your customers would. A dry seal test is useful, but it does not reveal how a saucy entree behaves after an hour in a delivery bag.
Check the Tray Rim Before Blaming the Machine
The sealing flange is the working surface of every tray. If it is damaged, wet, greasy, or covered with food, a perfect seal becomes much harder to achieve. Train staff to inspect trays as they load them and to reject containers with bent rims or visible defects.
Portioning methods matter here. A ladle, scoop, or filling nozzle that repeatedly splashes product onto the flange creates avoidable rework. For wet foods, set a realistic fill line below the rim and give staff a quick rim-wipe step before sealing. That extra second is usually less expensive than replacing leaked orders and losing customer confidence.
Set the Sealer for Your Actual Production Conditions
Tray sealing should be treated as a controlled production step, not a button press. Machine settings need to be validated for the container and material in use, then monitored as volume increases. A cycle that looks acceptable during a slow morning test may perform differently when trays are moving quickly during a lunch or weekly meal-prep run.
Start by confirming that the correct mold is installed for the tray size and shape. A mold that does not properly support the flange can lead to uneven pressure around the tray perimeter. Custom molds and custom-size machine development can be valuable when a business uses proprietary containers or needs packaging that supports a differentiated brand presentation.
Next, verify the film path and tension. Film should feed smoothly and sit correctly over the sealing area. Wrinkling, poor alignment, or inconsistent cutting can create weak points even when heat and pressure are otherwise correct. Operators should watch the first sealed trays after a film-roll change, cleaning cycle, or shift change rather than assuming the line will remain unchanged.
Use a defined verification routine. At scheduled intervals, pull a finished package and inspect the full seal perimeter. Look for wrinkles, gaps, loose corners, burn-through, incomplete cuts, or food caught in the seal area. Then perform a practical handling check appropriate to the product, such as gently tilting the package after it has cooled to its normal holding condition. Documenting recurring failures helps distinguish an operator issue from a material or equipment issue.
Do Not Ignore Temperature and Condensation
Hot food packaging introduces a balance between speed and package condition. When a hot product is sealed immediately, steam can create condensation around the flange or inside the package. Some products need a controlled cooling or settling period before sealing, while others need adjustments to the filling process to keep the rim clear.
The right approach depends on the food, required handling process, and packaging format. Avoid treating seal strength as a substitute for a validated food safety program. Your packaging process should support your established procedures for product handling, cooling, storage, and transport.
Build Leak Prevention Into the Line
Leak prevention becomes more reliable when each team member has a clear role. The person filling trays should protect the rim and follow the portion line. The sealing operator should confirm tray placement, film alignment, and finished-seal quality. A lead or production manager should review samples during the run and respond quickly when failures appear.
For higher-volume operations, consistency also depends on the equipment being sized for the job. Manual and semi-automatic workflows can be a practical fit for some businesses, while growing production lines may need a faster tray sealing setup. Selected SmartPackingUSA models can achieve up to approximately 600 trays per hour with one operator, depending on tray size, operator workflow, and production conditions. Capacity should be evaluated alongside the time needed to fill, inspect, label, stage, and pack orders. A fast sealer does not help if the upstream process cannot keep trays ready.
Sanitation and maintenance support seal quality as well. Keep the sealing surface, mold area, and film path clean according to your operating procedures. Residue can affect how trays sit in the mold and can create avoidable interruptions. Inspect wear components and address inconsistent seals early instead of allowing a small issue to become a full shift of repacked meals.
When Packaging Design Is the Real Fix
Sometimes leaks are not a training problem or a machine-setting problem. The tray itself may be too shallow for the portion, poorly suited to the product viscosity, or lacking enough headspace for its intended use. A larger or deeper container, a different compartment configuration, or a more appropriate flange design can solve the issue more effectively than continually adjusting the sealing cycle.
This is especially relevant for brands that want custom container dimensions, branded sealing film, or a distinctive meal presentation. Packaging should protect the product while making the order look organized and professional when customers open it. The best design is not necessarily the lightest or lowest-cost option. It is the one that performs consistently within your workflow and supports the customer experience you are trying to deliver.
SmartPackingUSA can help evaluate samples, container materials, compatible lids and films, machine configurations, and custom packaging requirements before you scale an order. Bringing the full system together gives operators fewer variables to troubleshoot and a clearer path to repeatable results.
A leak-free meal package is built before the delivery driver picks it up. Start with a compatible tray and sealing material, keep the rim clean, validate machine settings with real food, and make seal checks part of the daily routine. When the system is matched to the menu, your team can pack faster with greater confidence and send out meals that arrive looking the way your brand intended.
